Showing posts with label Holiday Tree. Show all posts

Friday, November 25, 2011

Holiday Tree: Christmas Advent Tree!

So throughout this year, I've had this cute manzanita "tree" that I've been decorating with cute holiday & seasonal decorations. See Here, Here, and Here for some of the other holidays.

The idea originally stemmed (Ha!) from an idea I saw of doing an advent tree this way. And I wanted one (in case you haven't noticed, I have this thing for advent calendars). Then I found this super cute kit and combined the ideas. :)
So per the kit instructions, I put together the little boxes, but I did not attach them to each other.


Instead, I punched a hole where I wanted the top and inserted an eyelet and threaded a ribbon so that it could hang. I also inked all the edges of the boxes with Tim Holtz Distress Ink in Walnut Stain (fav!) and by the time I was done, my hands were very black. :) I also put glitter glue all over them. Did you know I like sparkley things? :) I used foam 3D stickers to make each layer of the fronts pop more.
Then I just had to put the rest together. I thought this would take me just a couple of hours, but instead it took a couple of hours each day over the long weekend. I didn't mind, it was just more than I anticipated. But I am quite pleased with how it turned out.

Then I got to decorate my little tree.


Here are some close ups of the little boxes:


The only thing I would do differently would be to change the way the fronts open. I did it so they all open in different directions, but I would change it so they only opened from the sides. I'll just have to make sure not to have anything heavy in the ones that open from the top.

So there you have it.  Now I just need to fill them with treats. :)

***
Today I am grateful for paid vacations. Even though I actually don't get paid for the day after Thanksgiving, I am grateful for the holidays I do get paid for. :) Especially when I get to be out of town and on some grand adventure. As my friend said, "It's great when your at Disneyland and you realize that you are getting paid for it!" Amen.

Tuesday, September 20, 2011

Holiday Tree: Fall Edition!

I've been a slacker and didn't make a holiday tree for the summer (maybe next year?), but I did make one for fall this past weekend.

Here it is:

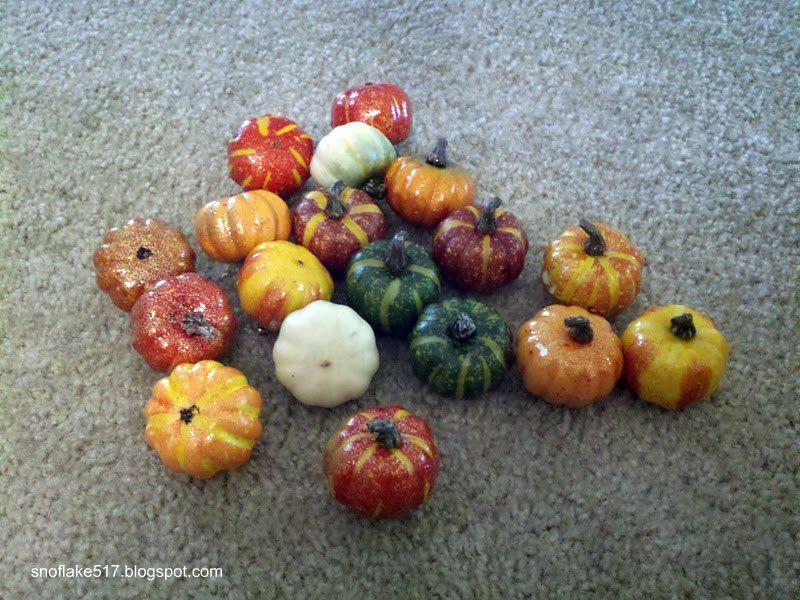
 I was going to make little fabric pumpkins like I did for my table, but that got tedious after three. So I didn't. Then at Michaels, I found these adorable little pumpkins for half off!


So I threaded a bit of embroidary floss through the base of the stems and hung them up. And it only cost me 5 bucks!

I also got these acrylic acorns that were super cute. I wanted to hang them on the tree, but come to find out there isn't a hole to put thread. So I'm not sure how I'll do it yet.


But I now have a Fall tree!

Thursday, March 24, 2011

**Holiday Tree: Easter Edition**

For how I made the tree, click here.

Here is a little tutorial on how I did my Easter Holiday Tree ornaments:

Fortunately, Joann's was having a sale and I found some cute foam eggs that I painted to spring colors (it took a few coats). To paint them, I put them on floral wire for easy handling. 
These are the foam eggs I used.
Yes, the floral wire is stuck in tealights. It was what I had handy so they could dry without getting smudged. :)
(It is times like these where I really miss my old house in Lincoln. I had an area in the living room that was all mine and had my table and all my craft stuff. Now, everything is scattered all over my floor. :( Oh well.)

Anyway, moving on. Then I attached ribbon using a brad and hot glue. The brads were little ones that looked like buttons, I just glued a rhinestone to the top. I like shiny and glittery. :)
Sorry this is an awful picture--my camera is having issues, but you get the idea.
Then I painted and glued and cut and glitter-ified the eggs to my heart's content. And my heart is definitely content! :) They turned out pretty cute, if I do say so myself.
**
For the butterflies, I attached ribbon that I had on hand to the back of the butterfly stickers (shown above, by K & Company) and then put them on pretty cardstock scraps I had, and then put some glitter glue on the pretty cardstock to give it a more finished look.  The stickers were sticky enough that I didn't have to glue the ribbon on.


Anyway...Then I decorated my tree! Yeah! So cute!! I'm not sure why, but the tree is much cuter in person. It doesn't photograph well. Maybe its the crappy lighting I have in my house. Anyway, I like it and that is what matters. :)


Friday, March 18, 2011

More Projects

In the hustle and bustle of this week and trying to get ready for the big *something* on Saturday (I'll explain on Sunday), I came across several blogs that inspired me to make a few projects-which I just had to make before Saturday! Because life not being hectic isn't fun! :) Here is what I came up with.

Kissing Balls aka Pomanders (as seen here):
Super easy. Just like I like it. It became even easier for me because the original tutorial said to hand punch all the flowers, but I happen to have my sister's Cricut so I used that and just picked a cute flower and cute hundreds of them in various colors. I was going for hydrangea colors. They would be really cute with a ribbon loop attached so they could hang from a mantel or something too. hmmmm...
Adding the flowers--I was fortunate to find pins that had pearlized heads at JoAnn's. So pretty!
Cute!
And because I needed a super cute way to display them (well, I did, didn't I?), naturally I made something. I've been secretly coveting the beautiful apothecary jars that seem to be everywhere, but I've never bought any because I feel like I can't justify $40-$60 for a pretty jar. But I want them, badly. Then this blog article came to the rescue! I love beautiful crafts made from junk, er, stuff at the dollar store! Think I just might have found a new favorite blog!

Apothecary Jars:
Unfortunately, my local dollar store didn't have anything that would work, so I headed to Wally-World and picked up these--all for $23!
After I cleaned the jars, but before I started gluing.
Waiting for the glue to cure. It's hard leaving them alone for 24 hours!!
Aren't they lovely?! I do want to make lids for them. But I'll do that later when I have more time.
Happy Birthday Banner:
So I wanted to make a cute Birthday Pennant Banner to go on my Holiday Tree. Here is what I came up with.

I went through my paper stash for cute patterned cardstock and then cut out the pennant shapes using the cricut.
Using Make the Cut to cut the pennant patterns
I laminated the outside of the pennant shapes to protect them as well as make them stiffer. Then I took the shapes, ran them through my Xyron sticker maker and folded it over the ribbon.


I took some letter stickers I had in my stash and put them on coordinating colored cardstock. I used a pop-dot to adhear the letters to the pennant.

TA DA! So adorable!

Saturday, March 5, 2011

**Holiday Tree: St. Patrick's Day Edition**

Not too long ago I found this wonderful Christmas Advent Tree here. So I came up with my own variation for a Year-Around Holiday Tree, which I think will be my big craft/decoration project this year.

***
This is how I built my tree:

I found this fabulous little ceramic pot at Ross for $3.00! And it was exactly the colors I wanted! The vase is pretty heavy so its fairly sturdy, but just for good measure, I hot glued some rocks from my backyard to the bottom of the pot.

I found the Manzanita branches here. I bought 3 of the sand-blasted ones--I wanted a light color so it will go with different ornaments all year long. (BTW-this site has tons of craft stuff on seriously discounted prices. For example, the branches were only $9/branch--other websites were charging almost $60, plus shipping, for 3 branches.)
Then I got a couple of styrofoam blocks from Joann's and stuck them in the pot. Then stuck the branches in the styrofoam blocks. Then a bit of moss on top to make it pretty. Ta Da!
***
Here is how I did my St. Patrick's Day ornaments.

I was really lucky (*snicker*) to find some party favors on clearance at Joann's so I just put ribbon on them (using a brad & hot glue) and hung them up. Super easy!
I also had green curling ribbon so I just made some long curls and draped them on the tree.

The crystals are from the same website I got the manzanita, but I've seen them lots of different places. I think I might keep those on all the time. I like 'em!

I also found some 1" clothespins that are adorable! I'm going to paint them to match the different holidays so things can by clipped to it too.

The final look: