Wednesday, February 1, 2012

Beautiful Sunset


I was out running some errands the other evening and snagged a couple of pictures of the sunset. It was so cool against the dark purple clouds! :)

Sunday, January 29, 2012

Rachel + Jesse

Last night Monica, Cait, and I got together and hung out and played with the babies. Yay! I haven't seen Jesse (Monica's baby boy) in over a month and so it was fun to see how big and fun he's gotten. He is a super smiley baby and giggles a lot and he's starting to get chubby! So cute!


I love the smug look on Nick's face. He's all, "Yeah, I got her to fall asleep. Take that Momma!" And it was funny because Cait pointed out that Rachel sleeps just like Nick, with her hands up above her head.


It was fun to compare Jesse & Rachel's sizes and their personalities (so far). :) Yay for babies!!

Thursday, January 26, 2012

Amazing Skills

In my recent obsession with Pintrest, I've discovered a new artist...Yulia Brodskaya. She is so amazing!!!! Seriously. I am in awe at the things she does with PAPER! The actual technique is called Quilling, an old art form that twists and curls thin strips of paper. She makes it look so simple and effortless. I know that it's not, but I can't help but think it is so easy. Here are a few pictures from her website. Definitely go to her website and see more examples of her awesome-ness.

1027101244530153

designfetishyuliabrodskayapapergraphics3

love_american_style

yulia-brodskaya

yulia-brodskaya-03

This definitely inspires me to kick up my quilling skills. :)

Sunday, January 22, 2012

Delicious Fat Free Dessert

It's really true! This dessert is fat free. And it's really delicious!! It does have a fair amount of sugar, but it's a dessert so that is expected. Oh, and it's super easy!

Angel Food Cake with Cream and Strawberries

Ingredients:
1 box Angel Food Cake Mix
    --water per the cake recipe
1 large box Vanilla Sugar Free/Fat Free Jello Pudding
2 3/4 cups Milk
1 small tub Fat Free Cool Whip
Strawberries, chopped up

Directions:
Make the cake per the directions on the back of the box.  I didn't have a bundt pan and so I used two loaf pans, it worked perfectly. If you do loaf pans, the cooking time is a bit shorter. I think it took about 30 minutes to cook. Once cooked, let the cake cool completely.

While the cake is cooling, mix up the Milk and Pudding mix. Add cool whip to taste. I used only half of the container, but should have mixed in more. :) Set in fridge to chill.


Add a bit of sugar the chop strawberries and mix. Let this rest in the fridge till the cake is cool. This will create a bit of strawberry syrup. So yummy!

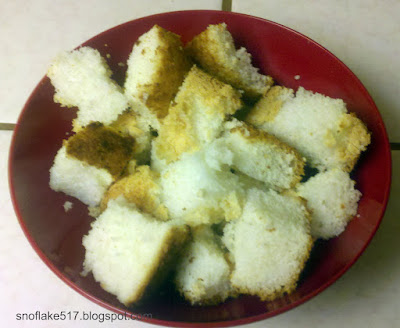
When the cake is cool, chop into squares.


Put a generous amount of pudding on top and sprinkle with strawberries and a little of the syrup.


Here's another variation, with slices of cake:


Eat and don't feel guilty about having a divine dessert! :)

Thursday, January 19, 2012

Winter is Finally Here!


YAY!!!!!

It has been so dry here that I thought my skin would turn to dust! Oh wait, it did. Seriously. One day I put lotion on 6 times! And I HATE lotion--that's how dry my skin has been! I don't think it was even this dry in Rexburg. We haven't had any rain since the beginning of December and so today's weather was a very welcome change. Too bad I couldn't go outside and soak it up. :)

Tuesday, January 17, 2012

Fun Facts

Last night I hung out at Cait's house and Nick fed me dinner and I fed Rachel dinner. It was awesome. And I didn't have to change any poopy diapers. Even better. :)

Oh, and let's be clear, I fed Rachel using a BOTTLE. ;)

Also, I have clean clothes. Cait was generous and let me do laundry at her house because my dryer is still broken. I learned a fun fact about her washing machine: It can hold up to 187 baby clothes items. Apparently Caitlin was so bored that she actually counted the number of items she put in the washing machine.

Yep. That's my sister. :)
And here is precious Rachel last night. Totally passed out.

Another fun fact: Rachel makes awesome angry faces when she is asleep. Especially when Caitlin decided to wake her up using Nick's cold hands. :) Last night we were quite entertained. I wish I had been able to get pictures of them.  Rachel has Cait's chin, my grandpa Bryson's nose, and Cait's attitude. Awesome!! :)

Sunday, January 15, 2012

Paint Chip Mural

Let me just start by saying that my favorite thing about this project was it's price. FREE!

And this week, or at least until payday next Monday, Free is my BFF.

Let me also say that I RARELY come up with my own cool ideas. It's true. I'm sorry if I just crushed someone's heart. Usually I just take someone else's idea and adapt it a little so it works for me. This project is a prime example.

So I came across a really cool project here quite awhile ago. It's a paint chip mural. Here's a pic from the blog I found it on. 
Via
Awesome, right? Color inspires me. I love having lots of colors around me and so I thought this would be a fun way to incorporate some into my bedroom, which is mostly blacks and whites. Oh, except for my quilt. That has lots of bright, fun colors. Anywhoo...I thought the idea was sooo cool and wanted to do it, but it had been relegated to the "some day, maybe" pile.

Not anymore. [insert mischievous laugh here] ;)

I've had these three canvas panels for several years. I got this really cool idea for doing a three panel painting and hanging it up to take up a large spot on my wall. Problem is that I lost steam with it and am not happy with the way it's turning out.


Seriously, the painting has looked like this for almost two years and has mostly sat in the back of my closet. I'm not too proud to admit that it is awful looking. I've worked on a bit here and there, but I'm just not happy with it. The colors are drab and I hate how the rocks turned out (my roommate aptly put that it looked like a large pile of poo. Gee, Thanks.). So now it's time to do something with them. I've had a few ideas here and there, but nothing that just screamed, "YOU NEED ME!" to me.
Hey, guess what?! This mural thingy does! Except with different colors. And in a 3 panel painting kinda way.

So here are the materials:
  • acrylic paint (a custom blue color that I mixed up)
  • TONS of paint chips that I picked up at Lowe's. I calculated that I would need 108 2"x2" squares. Now, this is evidence that my math skills, ummm...leave something to be desired. I actually needed 216. Good thing I got over 250. (Now what to do with the leftovers?....hmmmm....)
  • Mod Podge
  • 3- 12"x24" canvases
  • spray adhesive

The first thing I did was cut the paint chips down to 2"x2" squares (which took hours). Then I laid them out in a pattern I liked. The cool thing about the paint chips I used is that some of them have different textures and finishes and some are metallic. I like the variation in the colors/textures. :)

I numbered the backs so that I made sure I put them in the right order when I put them back on to the canvas. Not that it really mattered though; the pattern was random.

So then I I thought I could just use mod podge to adhere them to the canvas. Then I discovered that it wasn't really sticking very well to the canvas (the corners wouldn't stay down) so I just used the spray adhesive. It worked better. 

For the edges of the canvas, I tried to "wrap" the paint chips around it, but when I tried it, it didn't really work. So I painted the edges using a medium blue with a bit of white.

Here's how it looked when all three were covered:


Once all the paint chips were adhered, I decided that I wanted more of a distressed look. Well, I really wanted to throw glitter all over it, but then I didn't want to turn my bedroom in to 1) a giant snow globe with glitter flying everywhere, or 2) a six-year old girl's dream room.

I decided against the glitter and found this wood stain in "Red Mahogany." I wanted a darker color than a dark red, but since this was in my garage and it was free, I rolled with it.


I forgot to take pictures of the staining process, but it was easy. All I did was paint on a layer of the dark red layer. 10 minutes later when I wiped it off, I decided that one layer was enough. All the lighter cream chips had turned a bit pink.


When the stain was completely dry (I let it dry overnight, just to be safe), I put on 3 layers of mod podge. On the last layer, I tinted the glue with a bit of silver paint to make it bit sparkly.

To hang up the canvases, I discovered that the 3M removable hooks (the small metal ones) were exactly the right size to hook on to the back of the wood on the canvas. Brilliant! Best part is that I could move around the hooks without putting tons of holes in the walls--obviously I don't own a level and so this was necessary. And still necessary... :)


Huzzah! Lovely, isn't it?! (P.S. The right answer is yes!) This is the view of my room when you stand in the doorway and look to the left.

I like it. The only thing I would probably change is the red stain (I would use something darker) and using not as much silver. I think the silver clouded up the colors too much. But it was free, so hey, I can't complain. :)

All in all, it was a fun little experiment with some new materials and techniques. And I finally did something with the canvas. Yay!